Do you want to make a time-lapse video that will show an event happening in a long time and you will time-lapse to show it in a short duration. For example the following video shows Jade building an airplane from Lego’s which will take long time but you want to time-lapse and show the complete process in a jiffy.
http://www.youtube.com/watch?v=mIzEKFjtwIg
Another example of such time-lapse video is posted here. There are lots of instances you can think of, for Time-Lapsing an event.
Now let us make such a video with Windows Live Movie Maker. First, fix the camera on a tripod. Making use of tripod will give you better uniform level photos of the event. Now keep on taking snaps after some interval of the event you want to time-lapse manually or with software that came with your camera. Take lots and lots of picture to get a better time-lapse effect. Here, a small tip- Try taking photos using laptop Web-Cam instead of regular camera and take pictures after regular interval automatically using some software like AvaCam or Microsoft Powertoy for XP- Webcam Timershot (this may work only with Windows XP). Such apps will help you to take photos automatically after a certain interval of time and save them.
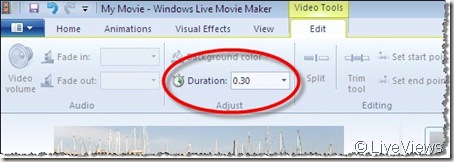
Now after getting lots and lots of pictures, load them into Windows Live Movie Maker. After loading them select all pictures (by right clicking > Select All) and set the Duration to a low value such as 0.3 sec.
That’s all and save them and run the movie to see the time-lapse effect.
Thanks to Windows Live Team Blog post for this tip -The “grown up” side of Windows Live Movie Maker where you can also read some more Movie maker related tips.
If you are not having Windows Live Movie Maker, you can get it from here . And its FREE !


No comments:
Post a Comment