For Silverlight Streaming, first of all you should have a Silverlight Streaming account. For this go to silverlight.live.com and create an account and you'll get 4GB of free hosting space to upload your media content.
Now follow these steps:z
Get yourself Expression Media Encoder which will be use for encoding. Now Encode your video. You can choose, what kind of audio/video profile you want as shown from the choice according to server you are targeting.
Also choose a player template you want from the output tab as shown.
After completion of Encoding process, the media file will open in the browser so that one can check it.After encoding you'll get an output directory with media file and other related files as shown.
Out of these files, you won't need .html, .aspx, .media, .csproj or .config files for Silverlight Streaming service, so you can delete them from the output directory. But you have to add a Manifest file, which describes the application.
Just open Notepad and type the content as shown and save it as Manifest.xml and add it with other files in the directory.
Now just zip all the files, but ensure that all the files are in root of zip file and not in any directory. Now you'll be having a zip file , ready to upload.
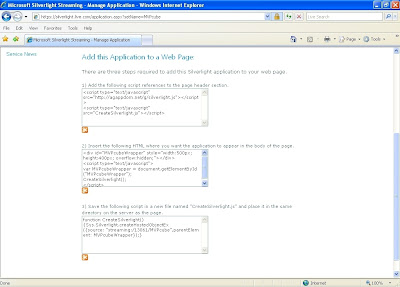
Now go to silverlight.live.com and from 'Manage Applications' upload the zip file. After that you'll be provided with the code that has to be added to your page.
But here, for us , slight change will be required as we want to do Silverlight Streaming on Blogger Blog as in one the steps of the code which we got says to put the code in a separate createSilverlight.js file which is not possible on Blogger as they won't allow you to host .js files. So first you have to modify the Blogger template.
So open the template settings and from 'edit HTML' put these code lines under 'head' section The above CreateSilverlight() function code should be in single line by removing any white spaces.
Now put the code obtained from 2nd step in body section, here you can specify the size of streaming media you want by changing width and height in the div tag. Save the template and post content and publish, if there are no errors, you can see the streaming video.
Here's the link where I had earlier posted the streaming video and various references on this Blog.
TIP: You must have seen that the video starts playing as soon as you open the page. So how to change this default behavior? Try this tip;
After encoding you'll get many files as shown above, among that there's a file called startplayer.js, you'll have to edit it after encoding and then zip it for uploading. You have to make autoplay to false as shown.
...............
StartPlayer_0.prototype= {
_handleLoad: function() {
this._player = $create( ExtendedPlayer.Player,
{ // properties
rootElement : $get(this._hostname).content.findName('Main'),
autoPlay : false,
volume : 1.0,
muted : false,
startTime : 0.0,
loopCount : 1,
autoScale : true
},
{ // event handlers
stateChanged: Function.createDelegate(this, this._onStateChanged)
},
null, $get(this._hostname) );
this._playNextVideo();
}, .....


1 comment:
Thanks for the HAT Tip ...w
Post a Comment